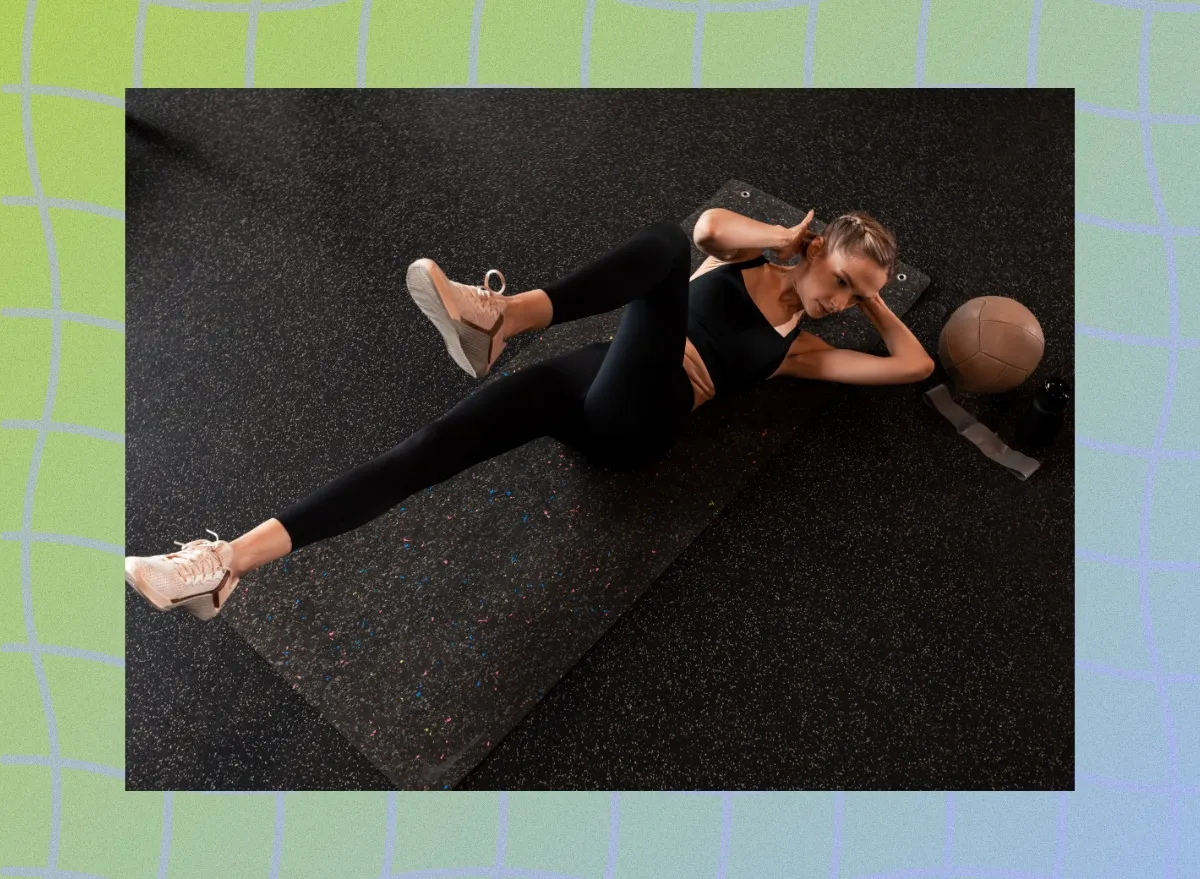
Many people assume that intense, sweat-drenching workouts are the only way to see results regarding burning belly fat. They think that the workout isn’t doing much for their body if they’re not out of breath or lifting heavy. But the truth is, low-intensity workouts can be just as effective in helping you shed that stubborn belly fat—without putting unnecessary stress on your joints or leaving you feeling drained. The key lies in consistency, smart progression, and focusing on movements that build lean muscle and boost your metabolism. So, I’ve put together the ultimate 30-day low-intensity workout to melt belly fat.
This workout program is designed to show you that slow and steady wins the fat-loss race. You’ll be working out in a sustainable way, balancing resistance training with gentle cardio to burn calories, tone muscles, and enhance overall fitness. No crazy equipment is required—just a couple of light weights, resistance bands, and your own body weight. Whether you’re new to working out or simply need a joint-friendly routine, this plan will keep you moving, motivated, and, most importantly, injury-free.
Low intensity doesn’t mean low results. Over the next 30 days, you’ll build momentum, gradually increasing the challenge while staying in a low-impact zone. You’ll melt fat while maintaining and building lean muscle, giving you more definition and a stronger core. Plus, because the workouts are manageable, you’re far more likely to stick with them, making long-term weight loss and fat reduction a reality.
Ready to get started? Let’s dive into the best 30-day low-intensity workout to lose belly fat. Below, I’ll explain what to expect from this program, how you’ll progress weekly, and the complete 30-day workout schedule to help you melt belly fat while keeping your body healthy and happy.
What To Expect During These Workouts

Throughout the next 30 days, you’ll alternate between low-impact resistance training and cardio workouts. These sessions torch fat and strengthen your muscles without pounding your joints. Don’t let the term “low intensity” fool you—while you won’t be sprinting, jumping, or lifting heavy, the focus on controlled movements and steady cardio will still get your heart rate up and your muscles working.
Expect:
- Improved muscle tone without joint pain
- Increased cardiovascular endurance from consistent aerobic work
- Sustainable fat loss over the 30 days
- Workouts that leave you feeling energized, not wiped out!
How To Progress from Week to Week


Progression is vital to keeping the challenge fresh and your body on its toes. You’ll start with the basics and add minor but effective weekly tweaks to maximize fat-burning and improve your fitness.
- Week 1: Get familiar with the exercises and nail down your form. Focus on consistency and keeping a steady pace.
- Week 2: Increase your reps or time in your workouts. If you feel confident, add a slight increase in resistance for strength days (e.g., light dumbbells, resistance bands).
- Week 3: Increase your workout duration for cardio sessions by 5–10 minutes. This small tweak ramps up calorie burn without pushing you into high-intensity territory.
- Week 4: You’re in the final stretch! Push yourself by increasing resistance, adding an extra set, or bumping up the speed during your cardio workouts.
Make sure you’re challenging your body just a little more each day.
The 30-Day Low-Intensity Workout To Melt Belly Fat
Here’s your workout schedule for the next 30 days. I divided it into three resistance training days and three cardio days, with Sunday serving as a rest day to recharge your batteries.
Low-Impact Strength Workouts
Strength training doesn’t have to be high-impact to deliver results. These low-intensity resistance workouts will help you build muscle and burn fat without putting extra stress on your joints. By focusing on controlled movements and proper form, you’ll strengthen your core, lower body, and upper body while staying gentle on your body.
Day 1: Lower Body & Core Workout
What You Need: Just your body and a resistance band! This workout focuses on building strength in your legs and core while keeping it low-impact. You’ll need about 30 minutes to complete.
The Routine:
Circuit 1
- Bodyweight Squats (3 sets of 12-15 reps)
- Glute Bridges (3 sets of 12-15 reps)
- Resistance Band Lateral Walks (3 sets of 15 reps per side)
Circuit 2
- Plank to Knee Taps (3 sets of 12-15 reps)
- Side Planks (3 sets of 15 seconds per side)
- Bird Dog (3 sets of 12-15 reps)
Directions:
- Do the exercises in Circuit 1 for the listed number of reps.
- Complete as many rounds as possible in 3–5 minutes, depending on how much time you have.
- Rest, hydrate, and move on to Circuit 2.
- Complete the same rep scheme and rounds as in Circuit 1.
- Once you’ve finished both circuits, repeat each a second time.
Circuit 1
1. Bodyweight Squats
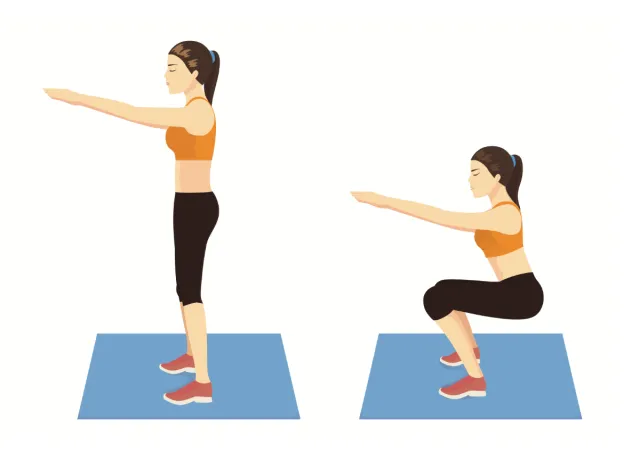

How To Do It:
- Stand with your feet shoulder-width apart, toes slightly pointed out.
- Keep your chest up and engage your core as you lower your hips down and back like you’re sitting in a chair.
- Lower until your thighs are parallel to the ground or as low as your mobility allows.
- Push through your heels to stand back up, keeping your knees tracking over your toes.
- Repeat for 12-15 reps.
2. Glute Bridges
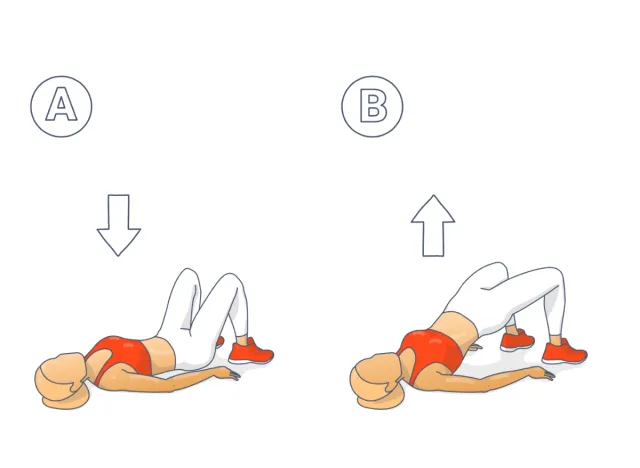

How To Do It:
- Lie on your back with your knees bent and feet flat on the floor, hip-width apart.
- Engage your core and squeeze your glutes as you lift your hips toward the ceiling, forming a straight line from your knees to your shoulders.
- Hold at the top for a second, then slowly lower your hips back to the ground.
- Repeat for 12-15 reps.
3. Resistance Band Lateral Walks
How To Do It:
- Place a resistance band around your thighs, just above your knees.
- Stand with your feet hip-width apart and slightly bend your knees.
- Step your right foot out to the side, followed by your left, maintaining tension on the band.
- Continue stepping side to side for 15 reps on each side.
- Keep your upper body steady and knees slightly bent throughout the movement.
Circuit 2
1. Plank to Knee Taps
How To Do It:
- Start in a plank position with your elbows directly under your shoulders and your body in a straight line from your head to your heels.
- Tap your right knee toward the floor while keeping your body stable and your hips level.
- Return your right leg to the starting position and repeat on the left side.
- Alternate sides for 12-15 reps.
2. Side Planks
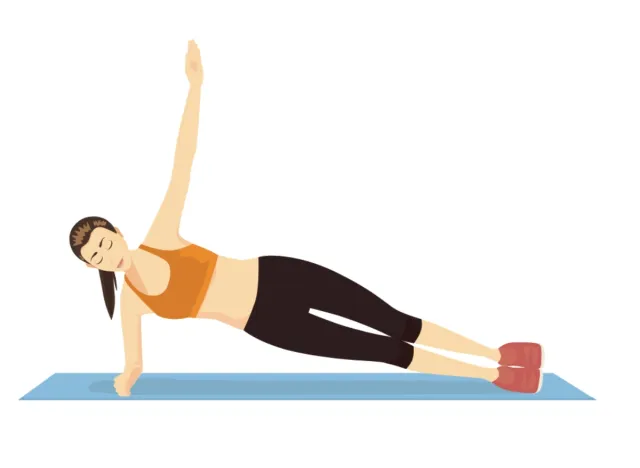

How To Do It:
- Lie on your side with your legs straight and stacked on top of each other.
- Prop yourself up on your forearm, with your elbow directly under your shoulder.
- Lift your hips off the ground, forming a straight line from your head to your heels.
- Hold the position for 15 seconds, engaging your core and glutes.
- Lower your hips back down with control.
- Switch sides and repeat for 15 seconds on the other side.
3. Bird Dog
How To Do It:
- Start on all fours with your hands under your shoulders and your knees under your hips.
- Extend your right arm straight forward and your left leg straight back, keeping your body in a straight line from fingers to toes.
- Hold for a second, then return to the starting position.
- Alternate sides, extending your left arm and right leg, and repeat for 12-15 reps per side.
Day 3: Upper-body & Core Workout
What You Need: Grab a pair of light dumbbells and a resistance band for this upper-body and core-focused session. It should take about 30 minutes to complete.
The Routine:
Circuit 1
- Pushups (3 sets of 10-12 reps, on knees if needed)
- Resistance Band Rows (3 sets of 12-15 reps)
- Dumbbell Lateral Raises (3 sets of 12 reps)
Circuit 2
- Resistance Band Bicep Curls (3 sets of 12 reps)
- Bird Dog (3 sets of 12-15 reps)
- Plank Shoulder Taps (3 sets of 15 taps per side)
Directions:
- Work through Circuit 1 by completing each exercise for the listed reps, repeating for 3 rounds.
- Rest as needed.
- Move to Circuit 2, following the rep schemes and performing for 3 rounds.
Circuit 1
1. Pushups
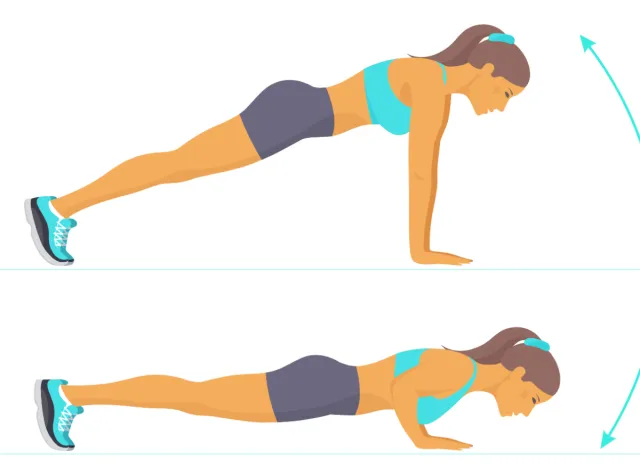

How To Do It:
- Begin in a high plank position, hands slightly wider than shoulder-width apart, and body in a straight line from your head to your heels.
- Lower your body toward the ground by bending your elbows, keeping them close to your sides.
- If needed, you can drop to your knees to perform the pushup.
- Push through your palms to return to the starting position.
- Repeat for 10-12 reps.
2. Resistance Band Rows
How To Do It:
- Secure a resistance band around a sturdy anchor at chest height.
- Stand facing the anchor point and hold the band with both hands, arms extended in front of you.
- Step back to create tension in the band.
- Pull the band toward your chest, squeezing your shoulder blades together.
- Slowly return to the starting position, fully extending your arms.
- Repeat for 12-15 reps.
3. Dumbbell Lateral Raises
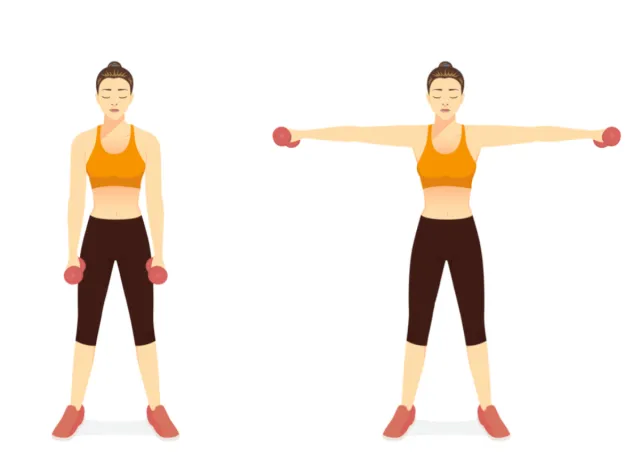

How To Do It:
- Stand with your feet shoulder-width apart, holding a dumbbell in each hand at your sides.
- Keeping your elbows slightly bent, raise your arms out to the sides until they are parallel to the ground.
- Hold for a second at the top, then slowly lower your arms back to the starting position.
- Repeat for 12 reps.
Circuit 2
1. Resistance Band Bicep Curls
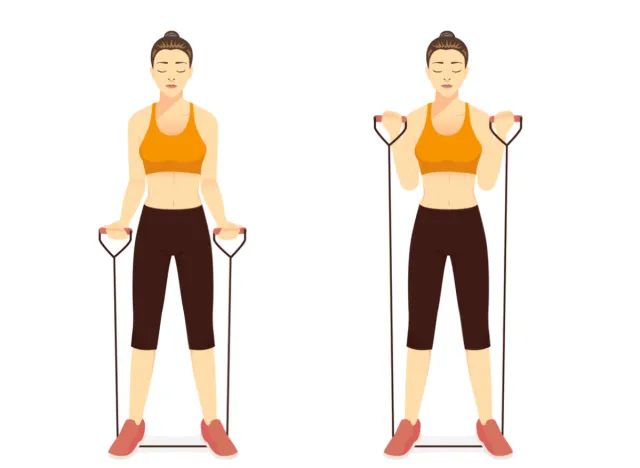

How To Do It:
- Stand on the middle of a resistance band with your feet shoulder-width apart, holding the ends of the band in each hand.
- Curl the band toward your shoulders with your palms facing upward by bending your elbows.
- Keep your elbows close to your body and squeeze your biceps at the top of the movement.
- Slowly lower the band back to the starting position.
- Repeat for 12 reps.
2. Bird Dog
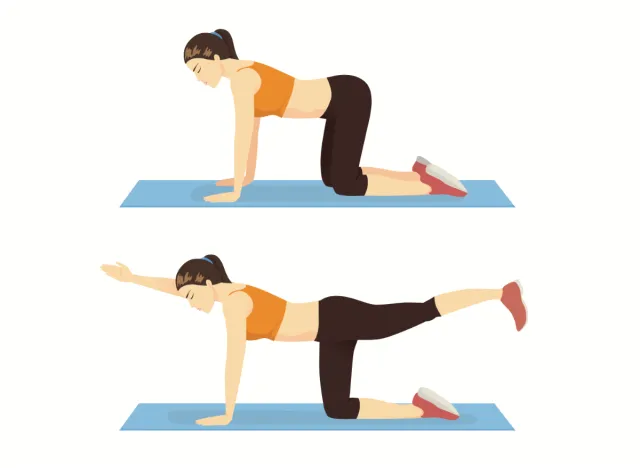

How To Do It:
- Start on all fours with your hands under your shoulders and your knees under your hips.
- Extend your right arm straight forward and your left leg straight back, maintaining a neutral spine.
- Hold for a moment, then return to the starting position.
- Alternate sides, extending your left arm and right leg.
- Repeat for 12-15 reps per side.
3. Plank Shoulder Taps
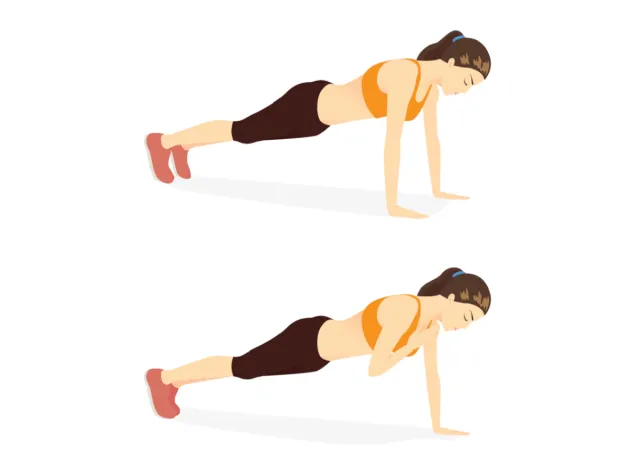

How To Do It:
- Begin in a high plank position with your hands directly under your shoulders and your body in a straight line from head to heels.
- Keeping your hips stable, lift your right hand to tap your left shoulder.
- Return your hand to the ground and repeat on the opposite side.
- Continue alternating sides for 15 taps per side, maintaining a strong core throughout the movement.
Day 5: Full-Body Circuit Workout
What You Need: A single dumbbell or kettlebell is all you need for this 30-minute full-body workout that combines strength and core movements.
The Routine:
Circuit 1
- Goblet Squats (3 sets of 12 reps)
- Seated Dumbbell Press (3 sets of 12 reps)
- Resistance Band Deadlifts (3 sets of 12-15 reps)
Circuit 2
- Step-ups (3 sets of 12 reps per side)
- Bicycle Crunches (3 sets of 15 reps per side)
- Side Plank Hip Lifts (3 sets of 12 reps per side)
Directions:
- Start with Circuit 1, completing each exercise for the listed reps and repeating as many rounds as possible in 10–15 minutes.
- Rest and rehydrate as needed.
- Next, complete Circuit 2 using the same time and rep guidelines as Circuit 1.
Circuit 1
1. Goblet Squats
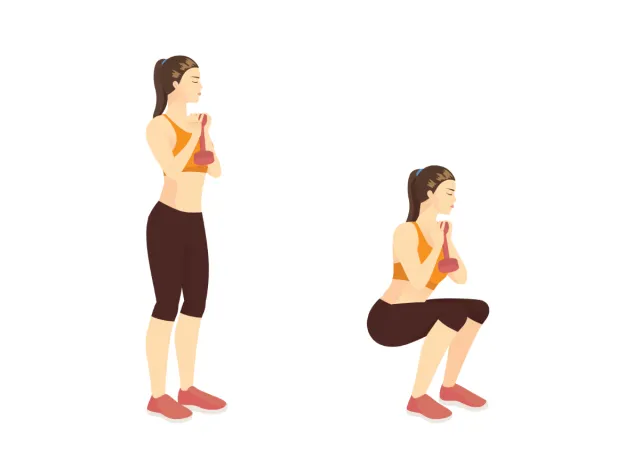

How To Do It:
- Stand with your feet shoulder-width apart, holding a dumbbell or kettlebell close to your chest with both hands.
- Engage your core and keep your chest up as you lower your hips down and back, like sitting in a chair.
- Lower until your thighs are parallel to the ground or as low as your mobility allows.
- Push through your heels to return to the starting position.
- Repeat for 12 reps.
2. Seated Dumbbell Press
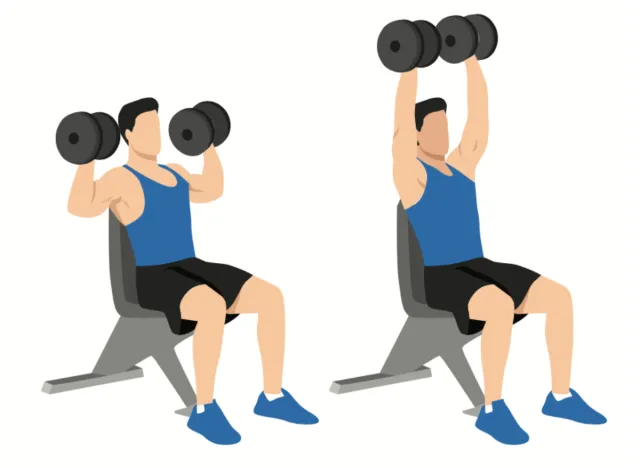

How To Do It:
- Sit on a bench or chair with a straight back, holding a dumbbell in each hand at shoulder height with your palms facing forward.
- Engage your core and press the dumbbells overhead until your arms are fully extended.
- Slowly lower the dumbbells back to the starting position at shoulder height.
- Repeat for 12 reps.
3. Resistance Band Deadlifts
How To Do It:
- Stand on the middle of a resistance band with your feet hip-width apart, holding the ends of the band in each hand.
- Hinge at your hips, lowering your torso while keeping your back straight and knees slightly bent.
- Drive through your heels and return to a standing position, engaging your glutes at the top.
- Repeat for 12-15 reps.
Circuit 2
1. Step-ups
How To Do It:
- Stand in front of a sturdy bench or step, holding a dumbbell in each hand if desired.
- Step up onto the bench with your right foot, pressing through your heel to lift your body up.
- Bring your left foot up to meet your right foot on the bench.
- Step back down with your left foot, followed by your right foot.
- Repeat for 12 reps on each side.
2. Bicycle Crunches
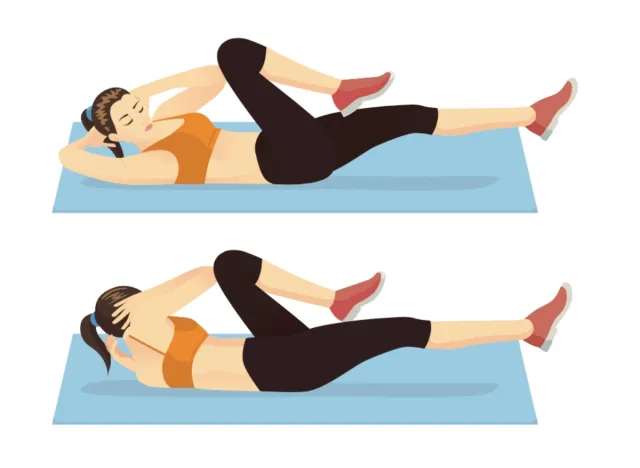

How To Do It:
- Lie on your back with your hands behind your head and your knees bent at a 90-degree angle.
- Lift your head, shoulders, and feet off the ground.
- Bring your right elbow toward your left knee while extending your right leg straight out.
- Switch sides by bringing your left elbow toward your right knee while extending your left leg.
- Continue alternating sides for 15 reps per side.
3. Side Plank Hip Lifts
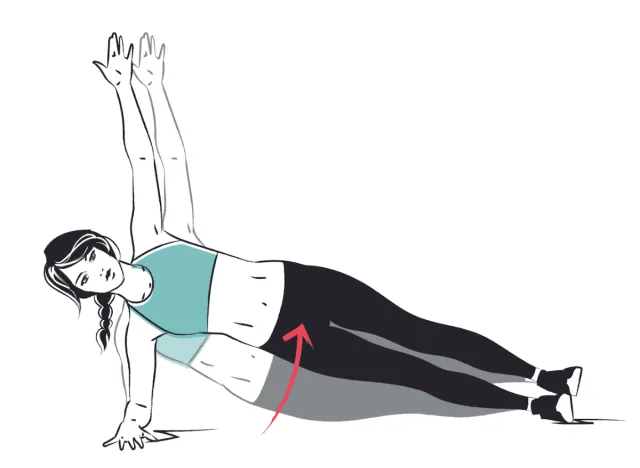

How To Do It:
- Start in a side plank position with your feet stacked on top of each other and your elbow directly under your shoulder.
- Lift your hips off the ground to create a straight line from head to heels.
- Lower your hips toward the ground without touching it, then lift back to the starting position.
- Repeat for 12 reps on each side.
Low-Impact Cardio Workouts
Cardio doesn’t have to be all about running or jumping. These low-impact cardio options are gentle yet effective for melting belly fat.
Day 2: Steady-State Swimming
Swim continuously for 30-45 minutes at a comfortable, steady pace. Focus on smooth, controlled strokes, whether you prefer freestyle, breaststroke, or a combination of both. Keep your breathing consistent and form strong to fully engage your entire body.
The Routine:
- Warm-up: Start with 5 minutes of easy swimming to warm up your muscles and establish a rhythm.
- Steady-state Swim: Swim for 25-35 minutes at a moderate pace, aiming to keep your effort level low to moderate. Focus on maintaining energy by maintaining a steady breathing pattern and using efficient strokes. If needed, use pool equipment like noodles, floatation aids, or kickboards for added support or variety.
- Cool-down: Finish with 5 minutes of gentle swimming or light kicking to cool down and relax your muscles.
Optional Alternatives: If swimming isn’t available or preferred, you can substitute this workout with an outdoor walk, a low-intensity hike, or a low-impact bodyweight circuit. Aim to complete these alternatives for the same 30-45-minute duration, maintaining a moderate, steady pace.
Day 4: Treadmill Walk
For this session, you’ll alternate between brisk walking and recovery periods to boost fat-burning and improve cardiovascular fitness. These intervals challenge you just enough to elevate your heart rate while keeping the impact on your joints low.
The Routine:
- Warm-up: Walk at an easy pace (0% incline) for 5 minutes to loosen up.
- Intervals (Repeat for 30-45 minutes):
Brisk Walk: Set the treadmill to a 6-8% incline. Walk at a brisk pace where you’re slightly out of breath but can still speak (2-3 minutes).
Recovery Walk: Lower the incline to 1-2% and reduce the pace to a comfortable walk that allows you to catch your breath (2 minutes). - Cool-down: Finish with a 5-minute walk at a 0% incline to gradually bring your heart rate down.
Day 6: Cycling (LISS—Low-intensity Steady State)
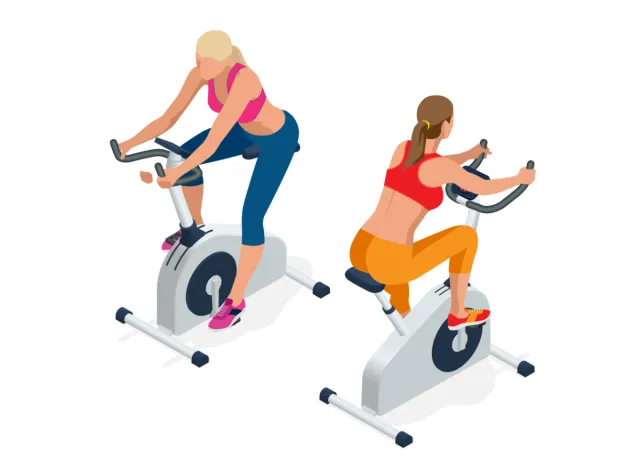

Hop on a stationary or outdoor bike for a 30-45 minute steady-state ride. The goal is to maintain a consistent, moderate pace throughout the session. Your effort level should be low enough that you can comfortably hold a conversation but high enough that you feel your legs working.
The Routine:
- Warm-up: Begin with 5 minutes of easy pedaling to warm up your legs and gradually elevate your heart rate.
- Steady Ride: Pedal consistently for 30-40 minutes, aiming for an effort level where you feel a gentle burn in your legs but aren’t straining. Keep your cadence smooth and controlled, focusing on deep breathing and maintaining good posture. If using a stationary bike, keep the resistance light to moderate.
- Cool-down: Finish with 5 minutes of easy pedaling to bring your heart rate back down.
Day 7: Rest Day
Rest is just as important as the workouts. Use this day to stretch, relax, and let your body recover.

