Jumping into a two-week cardio workout challenge can be a game-changer for those looking to lose belly fat and lay a strong foundation for future workouts. Over the next two weeks, this program brings together high-intensity circuits, endurance cardio, and core-focused movements designed to ramp up metabolism and maximize fat loss. Each workout is intentionally crafted to build cardiovascular endurance, lean muscle, and functional strength—all crucial elements in an effective fat-burning routine.
In the first week, you’ll establish a foundation by mixing strength-based cardio, steady-state cycling, and bodyweight HIIT to get your metabolism fired up. By working both strength and stamina, this approach encourages a calorie-torching “afterburn effect,” which keeps your metabolism elevated long after you finish each session. Each day pushes you out of your comfort zone, but low-intensity sessions and rest days are strategically placed to help your body adapt and recover.
Week two will crank things up a notch by adding more rounds, varying intensity, and incorporating new challenges to keep your body guessing. This progression in intensity ensures that you keep building on the previous week’s gains, setting yourself up for noticeable changes in endurance, strength, and body composition. Stick with it, and by the end of the challenge, you’ll feel stronger and fitter and see the results reflected in the mirror.
Now, let’s dive into the best two-week cardio workout challenge to lose belly fat.
The Best Cardio Workouts to Burn Belly Fat: How HIIT and 2-Week Challenges Boost Weight Loss
A potent mix of strength training, cardio, and nutrition is a foolproof key to weight loss and cutting down on stubborn belly fat. But when you’re about to kick off your weight-loss journey, which workouts are best, and how does a two-week cardio challenge really help you achieve your goals?
The Best Cardio to Burn Belly Fat Fast
When it comes to torching belly fat quickly, the best cardio is high-intensity interval training (HIIT). This style of cardio alternates between short, intense bursts of effort and brief recovery periods. Research shows that HIIT can help burn more fat faster than steady-state cardio, making it highly effective for targeting stubborn belly fat. Unlike longer sessions of moderate cardio, HIIT pushes your body to work harder in shorter intervals, which increases your calorie burn.
How a 2-Week Cardio Challenge Helps With Weight Loss
A two-week cardio workout challenge is an effective way to jumpstart your weight loss because it helps to build consistency and intensity in your workouts. Over the span of two weeks, incorporating various forms of cardio can increase your overall caloric burn, raise your metabolism, and help establish a routine that keeps you committed to your fitness goals.
The structured nature of a short-term challenge makes it easier to maintain a high level of focus and motivation, providing a noticeable boost in your endurance and, more importantly, leading to quick wins that encourage you to keep going after the challenge.
Can High-Intensity Workouts Really Melt Belly Fat?
Yes, high-intensity workouts can play a major role in melting belly fat. Because they demand high levels of energy from your body, these workouts elevate your heart rate quickly and keep it high throughout the session. This promotes a higher caloric burn and mobilizes stored fat for fuel, particularly in the abdominal area.
Plus, high-intensity cardio has been shown to influence the reduction of visceral fat—the type of fat stored around your organs that can increase health risks. This makes high-intensity workouts not just effective for shedding belly fat but also highly beneficial for overall metabolic health.
Day 1: Fat-Burning Strength AMRAP
Why: AMRAP workouts are excellent for building muscular endurance and boosting metabolism. They challenge clients to push as hard as possible within a set time frame, combining strength and cardio into one effective fat-burning session. AMRAP’s intensity keeps clients engaged and motivated, providing physical and mental benefits.
What You Need: Bodyweight or a small set of kettlebells or dumbbells. This 12-minute AMRAP circuit keeps the heart rate up and boosts muscular endurance.
The Routine:
- Pushups (10 reps)
- Air Squats (15 reps)
- Kettlebell Swings (10 reps)
- Mountain Climbers (20 reps)
Directions: Complete as many rounds of the exercises as possible within 12 minutes. Rest only as needed. If desired, rest for 5 minutes and complete a second round of the AMRAP.
How To Do It:
1. Pushups
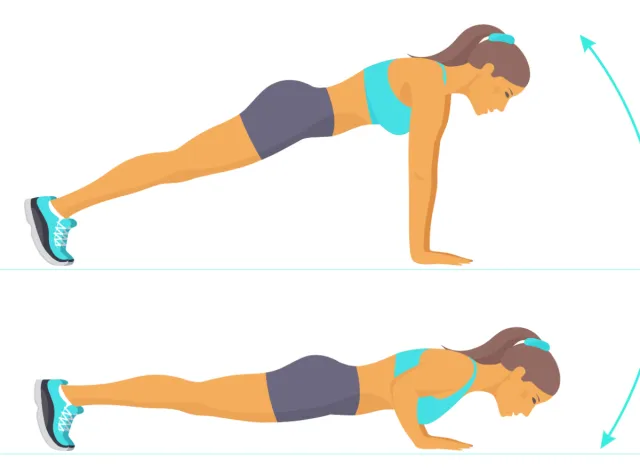

- Begin in a strong plank position, with your hands slightly wider than shoulder width and your body in a straight line from head to heels.
- Engage your core and keep your elbows close to your body as you lower your chest toward the floor, aiming to align your shoulders, hips, and knees.
- Push through your palms to extend your arms and return to the starting position, fully extending the elbows at the top.
2. Air Squats
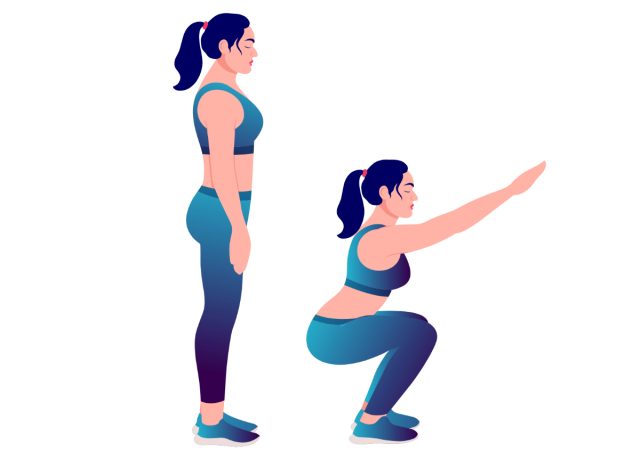

- Stand with feet shoulder-width apart and toes pointing slightly out.
- Engage your core.
- As you lower into a squat, push your hips back and keep your chest up, ensuring your knees track over your toes without collapsing inward.
- Lower down until your thighs are parallel to the ground (or as low as comfortable).
- Press through your heels to stand back up, squeezing your glutes at the top.
3. Kettlebell Swings
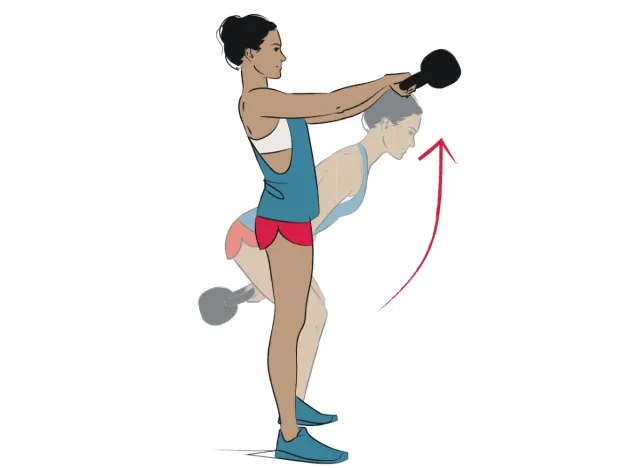

- Hold a kettlebell with both hands in front of you, standing with feet slightly wider than shoulder-width.
- Hinge at the hips and pull the kettlebell between your legs using your lats.
- Keep a slight bend in your knees.
- Drive your hips forward to swing the kettlebell to shoulder height, using momentum rather than lifting with your arms.
- Allow the kettlebell to swing back down, repeating the hip hinge for each rep.
4. Mountain Climbers
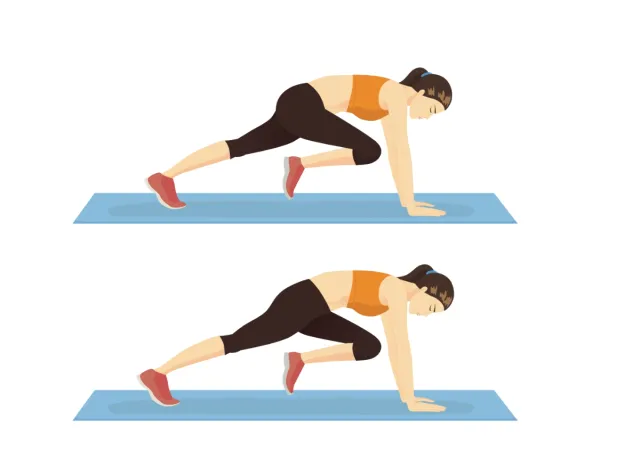

- Start in a plank position with your shoulders stacked over your wrists and body in a straight line.
- Drive one knee toward your chest, then quickly switch legs as if “running” in place, keeping your core tight to prevent your hips from lifting.
- Maintain a controlled, quick pace to keep your heart rate up, ensuring smooth transitions between each knee drive.
Day 2: Assault Bike High-Intensity Intervals
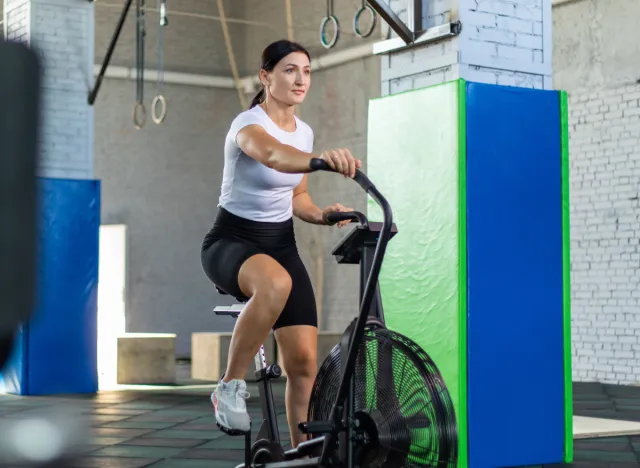
Why: The assault bike is my absolute favorite fat-loss workout due to its ability to drive high-intensity, full-body workouts. Because it simultaneously engages both the upper and lower body, the assault bike pushes your body’s metabolic rate sky-high, promoting the afterburn effect.
What You Need: Assault bike. This intense interval workout maximizes calorie burn in just 20 minutes.
The Routine:
- Assault Bike Sprint (20 seconds)
- Rest (10 seconds)
- Repeat for 8 rounds
- Rest 2-3 minutes and complete 3 sets total
Directions: Use the assault bike to complete 20-second sprints, followed by 10 seconds of rest. Complete 8 rounds, then rest 2-3 minutes before starting the next set.
How To Do It:
1. Assault Bike Sprint
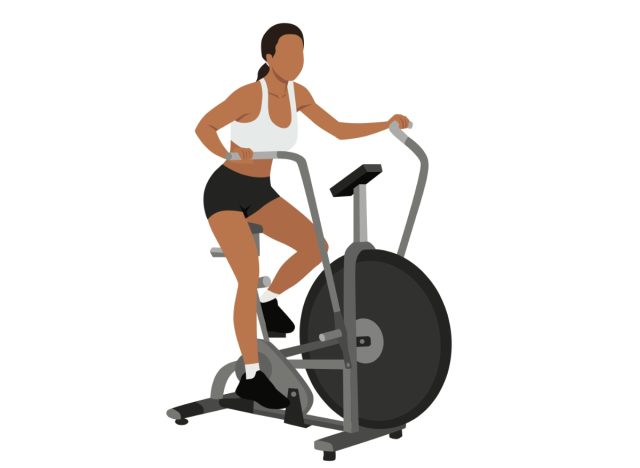

- Set the assault bike resistance level.
- Sprint all-out for 20 seconds, pushing and pulling the handles while pedaling as fast as possible.
- Rest for 10 seconds by staying seated on the bike without moving.
Day 3: Steady-State Cycling
Why: Steady-state cycling helps build a solid aerobic foundation for consistent fat loss. It’s especially beneficial for those with joint concerns since it reduces the impact on knees and ankles. Steady-state cycling helps tap into fat stores as the body uses oxygen to fuel the activity, making it a great addition to any weight-loss routine. Cycling also makes for an effective low-intensity workout that allows your upper body to recover while burning fat.
What You Need: Stationary or road bike. This 45-minute steady-state ride will build endurance and burn calories efficiently.
The Routine:
- Warm-Up Cycle (5 minutes)
- Steady-State Cycle (45 minutes)
Directions: Begin with a 5-minute warm-up cycle, then cycle at a moderate, steady pace for 45 minutes.
How To Do It:
1. Warm-Up Cycle
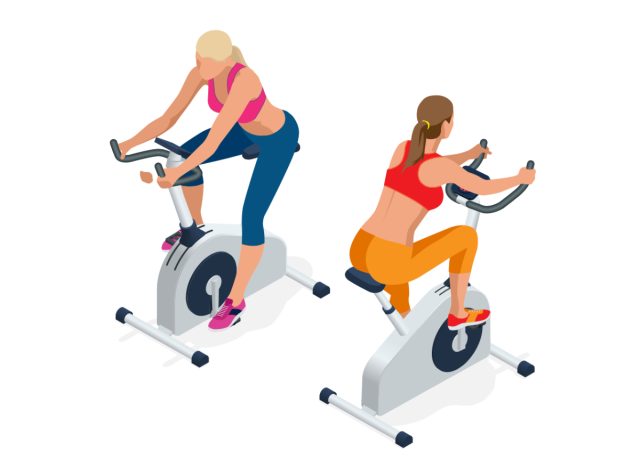

- Start pedaling at an easy pace to warm up your legs and prepare for the workout.
2. Steady-State Cycle
- Maintain a consistent, moderate pace for 45 minutes.
- If using a stationary bike, adjust the resistance as needed every 10 minutes.
Day 4: High-Intensity Interval Training (HIIT)
Why: HIIT workouts are a staple for weight loss due to their time efficiency and metabolic effects. By alternating between intense, short bursts of exercise and brief rest periods, HIIT forces the body to work harder in a shorter time. This increases calorie burn during and after the workout, helping clients achieve a leaner physique faster.
What You Need: A sled, battle ropes, kettlebell, and med ball. This HIIT workout mixes strength and cardio with four powerful exercises to boost metabolism.
The Routine:
- Sled Push (30 seconds)
- Battle Ropes (30 seconds)
- Kettlebell Swings (30 seconds)
- Med Ball Slams (30 seconds)
- Rest (1-2 minutes)
- Repeat for 4 rounds
Directions: Perform each exercise for 30 seconds and rest for 15 seconds between exercises. After one full round, rest for 1-2 minutes and repeat. If desired, rest for ten minutes, then complete the workout for a second round.
How To Do It:
1. Sled Push
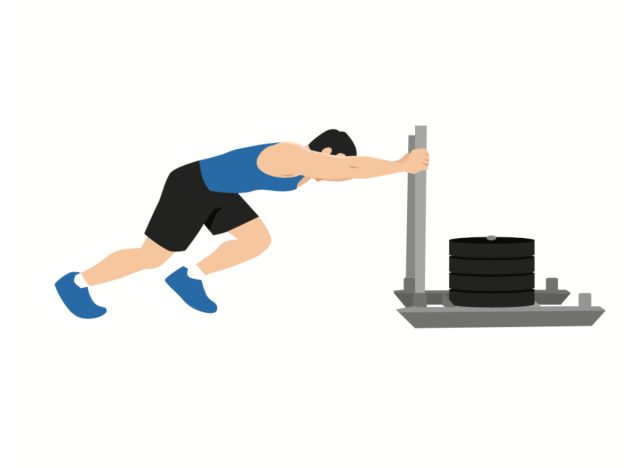

- Set up the sled with a weight that challenges you but allows controlled movement.
- Stand behind the sled, gripping the handles firmly with both hands and your arms straight.
- Lower your body slightly, lean forward, and push through your legs, driving the sled forward with strong, powerful strides.
- Keep your core tight and maintain a steady pace, focusing on quick, explosive steps.
2. Battle Ropes
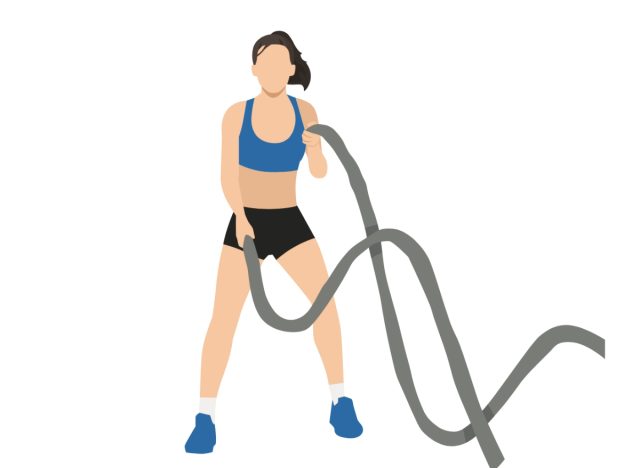

- Stand with feet hip-width apart, holding one end of the rope in each hand with a firm grip.
- Engage your core, bend your knees slightly, and keep your back straight.
- Begin with an alternating motion, lifting one arm up as the other comes down, creating a continuous wave pattern.
- Move rapidly, maintaining a consistent rhythm to maintain tension in the ropes. Aim to keep each arm moving independently.
3. Kettlebell Swings
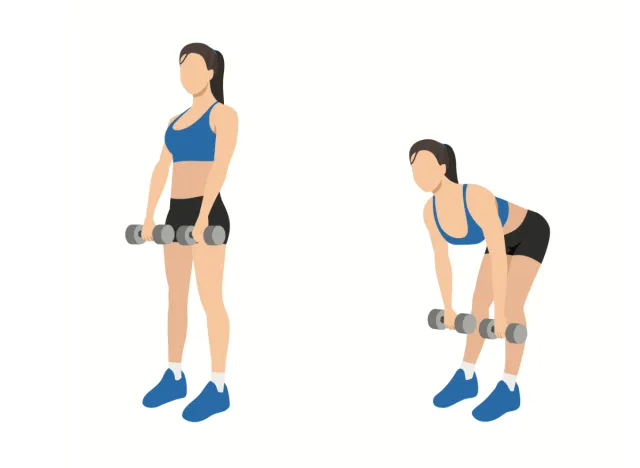

- Stand with feet slightly wider than shoulder-width, holding a kettlebell with both hands.
- Engage your core and hinge at the hips, bringing the kettlebell between your legs while maintaining a slight knee bend.
- Thrust your hips forward with power, driving the kettlebell up to shoulder height. Avoid lifting with your arms—let your hips generate the momentum.
- As the kettlebell descends, control the motion and allow it to swing naturally back between your legs for the next rep.
4. Med Ball Slams
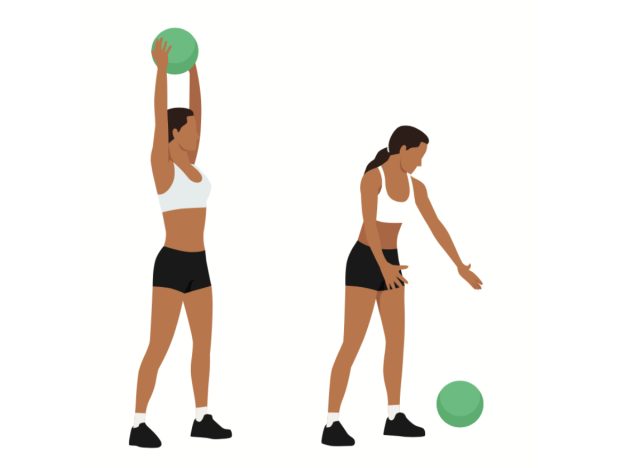

- Stand with feet hip-width apart, holding a sand-filled med ball (preferred for durability) with both hands overhead.
- Engage your core and slightly bend your knees as you prepare to slam.
- Using your entire body, forcefully drive the ball down into the ground before you.
- Catch the ball as it rebounds (if it does), or pick it up and reset. Repeat, maintaining a powerful and controlled motion with each slam.
Day 5: Long Rowing Intervals
Why: Rowing is a total-body, low-impact workout that burns calories while building muscle, especially in the back, shoulders, and legs. By incorporating longer, steady-state intervals, clients get the dual benefits of cardiovascular conditioning and muscle endurance, which are essential for sustainable weight loss.
What You Need: A rowing machine. This workout includes steady-state rowing intervals to boost cardiovascular fitness and aid fat loss in 30 minutes.
The Routine:
- Rowing (5 minutes) x 5 rounds
- Rest (2 minutes between rounds)
Directions: Row for 5 minutes at a moderate pace, then rest for 2 minutes. Repeat for 5 rounds, maintaining a steady rhythm.
How To Do It:
1. Rowing
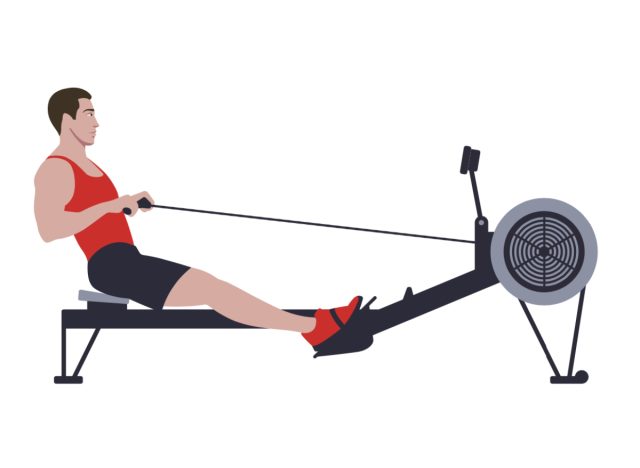

- Set the damper to a comfortable resistance level.
- Row with a steady stroke rate, focusing on pulling smoothly with your legs, back, and arms.
- Rest for 2 minutes between rounds.
Day 6: Dumbbell Weight-Loss Circuit
Why: This circuit combines compound movements that target multiple muscle groups, boosting heart rate and burning calories. By engaging both upper and lower-body muscles, this workout promotes full-body fat loss while building lean muscle and enhancing cardiovascular endurance.
What You Need: A set of moderate-weight dumbbells (choose a challenging weight that allows you to maintain good form for all 8 reps).
The Routine:
- Dumbbell Front Squat (8 Reps)
- Dumbbell Bent-Over Row (8 Reps)
- Dumbbell Deadlifts (8 Reps)
- Dumbbell Push Press (8 Reps)
- Dumbbell Plank with Pull-through (8 Reps each)
Directions: Complete 5 rounds of the dumbbell circuit, resting minimally between exercises. Take 2 minutes of rest between each round.
How To Do It:
1. Dumbbell Front Squat
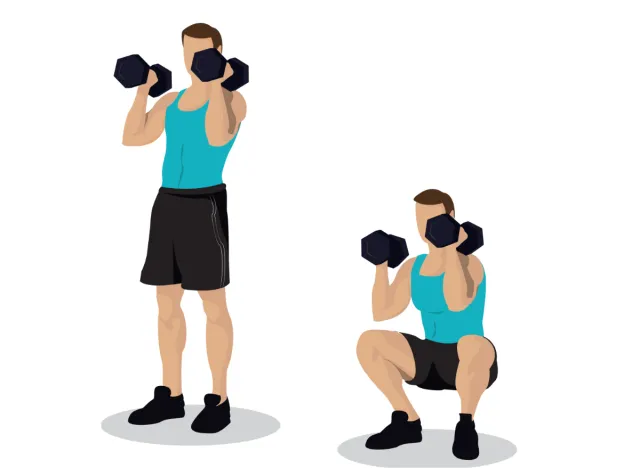

- Stand with feet shoulder-width apart, holding a dumbbell in each hand at shoulder height.
- Engage your core, keep your chest up, and lower into a squat by bending at the knees and hips.
- Aim to lower until your thighs are parallel to the ground, keeping your weight on your heels.
- Drive through your heels to return to standing, maintaining a firm grip on the dumbbells at shoulder height.
2. Dumbbell Bent-Over Row
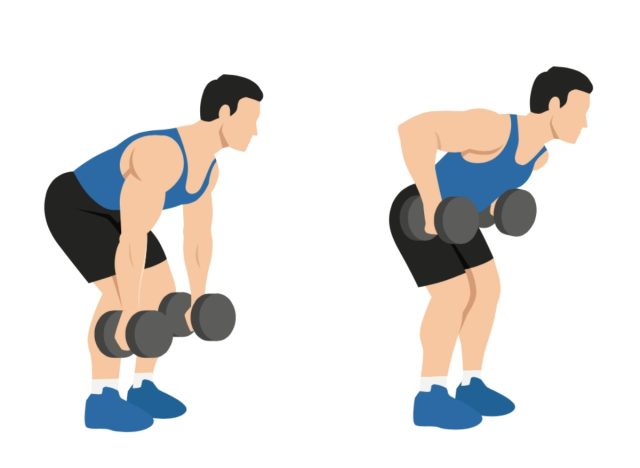

- Stand with feet hip-width apart, knees slightly bent, holding dumbbells at arm’s length.
- Hinge forward at the hips, keeping a flat back until your torso is nearly parallel to the floor.
- Pull the dumbbells toward your ribcage, squeezing your shoulder blades together.
- Slowly lower the dumbbells back down with control to complete one rep.
3. Dumbbell Deadlift


- Stand with feet hip-width apart, holding a dumbbell in each hand in front of your thighs.
- Hinge at the hips, lowering the dumbbells along your legs, keeping your back flat and chest up.
- Continue lowering until you feel a stretch in your hamstrings.
- Drive through your heels to return to standing.
- Squeeze your glutes at the top to fully extend your hips.
4. Dumbbell Push Press
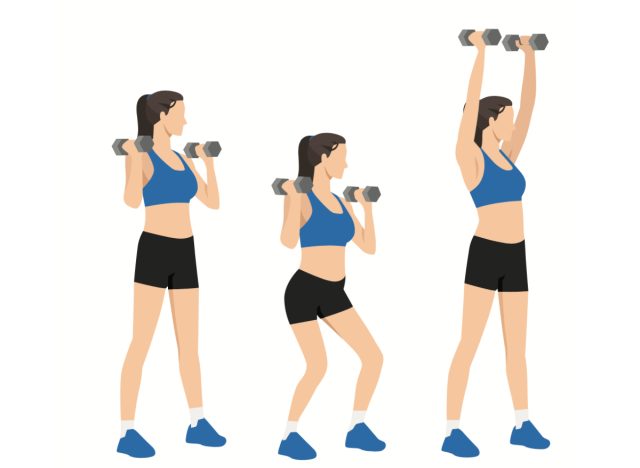

- Stand with feet shoulder-width apart, holding dumbbells at shoulder height with palms facing in.
- Bend your knees slightly, then explosively extend them to push the dumbbells overhead.
- Fully extend your arms at the top, locking out your elbows.
- Lower the dumbbells back to shoulder height in a controlled manner to finish the rep.
5. Dumbbell Plank with Pull-Through
- Start in a high plank position with a dumbbell outside your left hand.
- Keeping your core tight and hips level, reach your right hand under your body to grab the dumbbell.
- Pull the dumbbell across to the right side, place your hand back down, and repeat with the opposite hand.
- Alternate sides for each rep, focusing on minimizing hip movement throughout.
Day 7: Rest & Recovery Day
A rest day is essential for muscle recovery and overall performance. After six days of intense and varied workouts, taking a day to recharge allows your muscles to repair, which helps prevent injury and boosts progress.
On your rest day, focus on activities that promote relaxation and recovery, such as stretching, foam rolling, or a gentle walk. Staying hydrated and fueling your body with nutritious foods also play a key role in optimizing the recovery process, preparing you to come back stronger for the next workout.
Take time to evaluate how you feel and note any areas of tightness or soreness, as this can help you target mobility and flexibility exercises for continued progress.
How to Progress the Workouts for Week 2
For week two, your goal is to increase intensity by either extending workout times, adding more rounds, or incorporating more challenging versions of the exercises. These tweaks will keep your body adapting, allowing for continued improvement in endurance, strength, and fat loss.
Here’s a breakdown of how to level up each day’s workout for the final week of the challenge:
Day 1: Fat Burning Strength AMRAP
- Increase Workout Duration: Extend the AMRAP from 12 minutes to 15-18 minutes.
- Add Weight (Optional): For more of a challenge, use a heavier kettlebell or add a weighted vest.
- Additional Round: Complete two rounds of the AMRAP with a 5-minute rest between rounds.
Day 2: Assault Bike High-Intensity Intervals
- Increase Intervals: Bump up the rounds to 10 per set (from 8) for a greater calorie burn.
- Decrease Rest Time: If you’re feeling conditioned and ready for more, reduce the rest between rounds from 2-3 minutes to 1-2 minutes.
- Add a Set: For advanced progressions, add a fourth set for a total of 30 intervals.
Day 3: Steady-State Cycling
- Increase Duration: Extend the steady-state cycling from 45 minutes to 60 minutes to build greater endurance.
- Add Resistance: Increase the resistance level slightly every 10 minutes for a progressive challenge.
- Alternate Intensity: Every 5-10 minutes, add 1 minute of a faster pace to incorporate mini-intervals within the steady-state workout.
Day 4: High-Intensity Interval Training (HIIT)
- Increase Work Time: Move from 30 seconds of work to 40 seconds for each exercise while keeping rest periods at 15 seconds.
- Add a Round: Complete 5 rounds instead of four, resting 1-2 minutes between rounds.
- Increase Intensity of Moves: For the battle ropes, add double arm slams; for sled pushes, slightly increase the weight; for med ball slams, use a heavier ball, if possible.
Day 5: Long Rowing Intervals
- Increase Rowing Time: Row for 6 minutes instead of 5 per interval to build aerobic endurance.
- Shorten Rest Time: Reduce rest from 2 minutes to 1 minute between rounds.
- Alternate Stroke Rates: Alternate between a steady pace and a higher stroke rate every minute for added intensity.
Day 6: Dumbbell Weight Loss Circuit
- Increase Rounds: Complete 6 rounds of the circuit instead of 5.
- Add Reps: Move from 8 reps to 10 reps per exercise if manageable with good form.
- Progressive Overload: Use slightly heavier dumbbells if you can maintain form for all reps, aiming for a modest increase of 5-10%.
Day 7: Rest & Recovery Day
- Active Recovery: Take a 20-30 minute low-intensity walk and include dynamic stretching or a mobility-focused session to promote recovery.
- Evaluate Progress: Take time to assess improvements and areas for further focus, and reflect on how your body has adapted over the past two weeks.
By scaling up each workout in week two, you’re pushing toward greater gains in cardio capacity, muscular endurance, and fat loss. Stay mindful of form and recovery to get the best results from each session.


